Setup · from zero
Set up a panel, step by step.
From HACS to a powered-on, licensed panel — install the integration, restart Home Assistant, push the app over ADB, connect it, and build your pages in the visual editor. Driven by the real admin GUI, no cables, no touching the panel by hand.
Before you start
requirementsA Sonoff NSPanel Pro
The wall panel (480×480, Android 8.1) the app runs on.
ADB, one-time. Enable ADB over network on the panel and accept the RSA key once — then Home Assistant installs and updates the app for you, pure Python, no PC or cables.
The full walkthrough
25 steps · real GUIInstall
HACS
Add DomoDreams to HACS
One click opens your Home Assistant and offers to add the DomoDreams repository (category Integration). Confirm it, then hit Download on the page it opens — no custom-repository ceremony.

https://github.com/domodreams/home-assistant-nspanel-pro
Restart Home Assistant
Restart HA so the freshly-installed integration is loaded.
Settings → System → top-right ⋮ → Restart Home Assistant.
Integration
Home Assistant
Starting point
No DomoDreams panel configured yet.

Add the integration
Search for “DomoDreams Panel” among the brands.

Filter by brand
The search hides this instance’s other, private integrations.

New panel
No panel is online yet, so the flow goes straight to the manual form.

Panel identity
Device id “nspanel-salone” — it must match the app’s instanceName.

Device created
The integration registers the device in Home Assistant.

Configured
“DomoDreams Panel” is now among the active integrations.

App install
The panel
Bare panel
The panel’s Android launcher, with our app not yet installed.

Config panel · offline
“Panel offline”: the device exists in HA but the app isn’t there yet.

Setup / Update tool
Brings a new panel online over ADB, before it even speaks MQTT.

Panel address
The panel’s IP on the local network.

Connected
px30_evb · Android 8.1.0 · app not installed.

Installing
The v1.1.0 APK is downloaded from the GitHub release and installed on the panel.

Installed
“Installed v1.1.0 — up to date.” Signed with the new release key.

First boot
The app on the panel
First boot
“Waiting for configuration…” with a provisional id. Swipe down for settings.

Settings · to fill in
Panel name and MQTT address / credentials — the password is masked.

Filled in and connected
instanceName “nspanel-salone” (same as the HA device id) → “Connected”.

Build
Lay out your pages
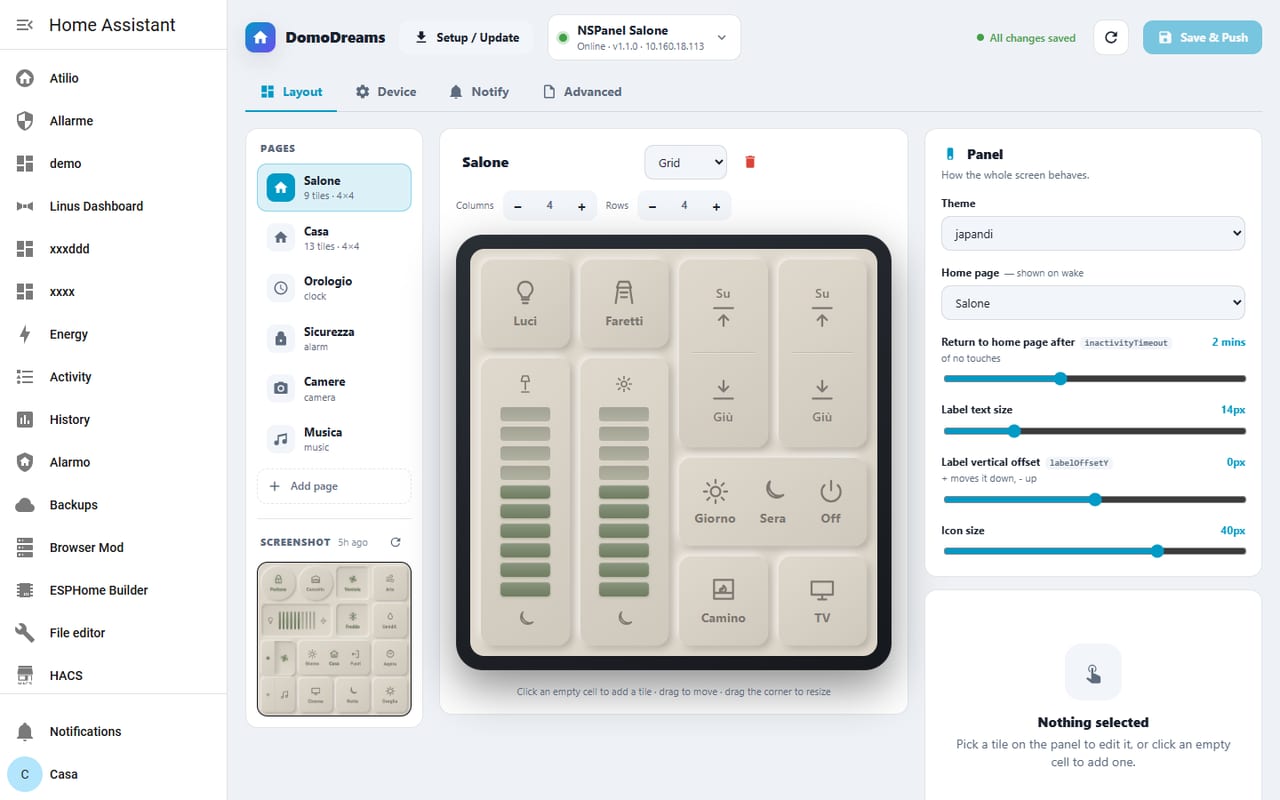
From the “NSPanel Pro” sidebar editor — visual, admin-only: pages on the left, a live panel preview in the middle, settings on the right.
Open the editor
“NSPanel Pro” in the HA sidebar opens the visual editor: your pages on the left, a live preview of the panel in the middle, and the panel settings on the right — theme, home page, timeouts, sizes.
Create a page
Hit Add page at the bottom of the list, name it and choose the Grid type, then set its columns and rows. It joins the swipe order and the middle preview redraws instantly as the real panel would.
Add page → name it → type Grid → set columns × rows.
Add a button
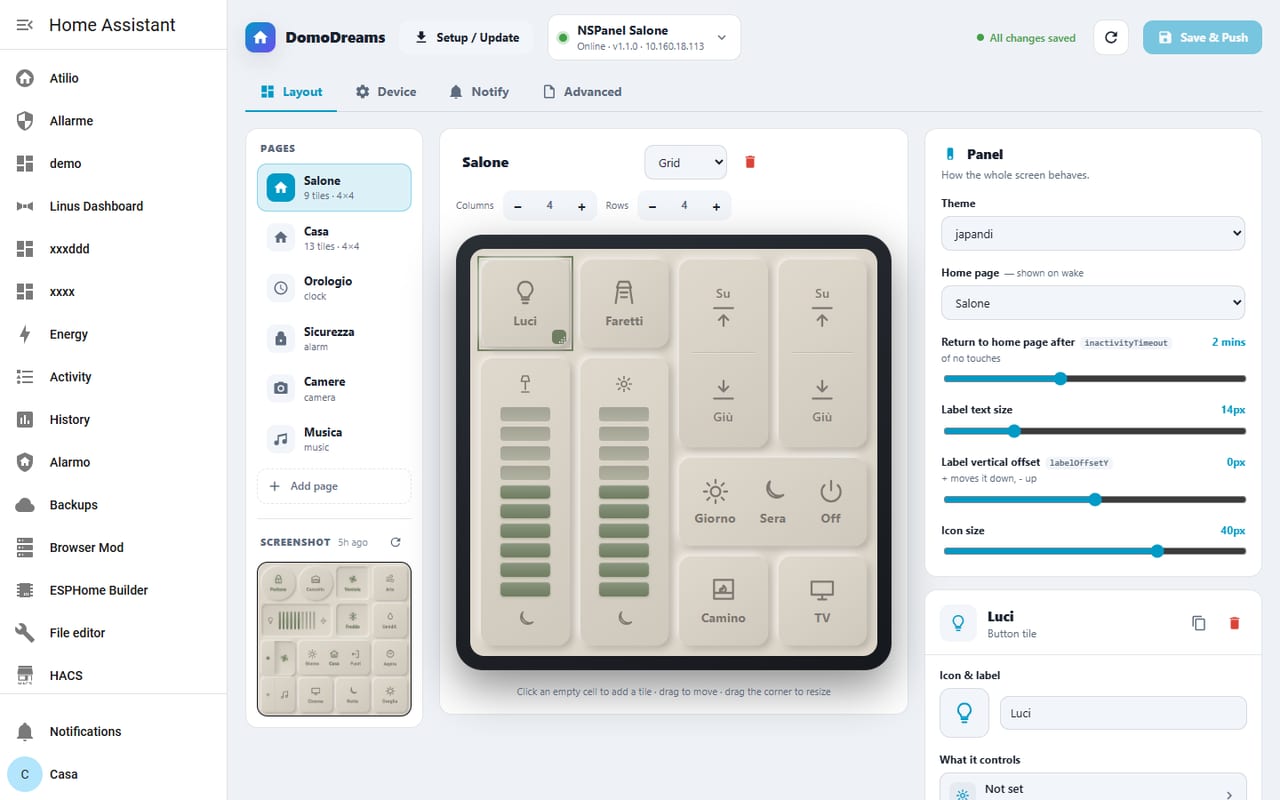
Click an empty cell and a tile drops in. Select it and the inspector on the right sets its icon, label and the entity it controls — every change lands live in the preview. Drag to move, drag a corner to resize.
Add any page type
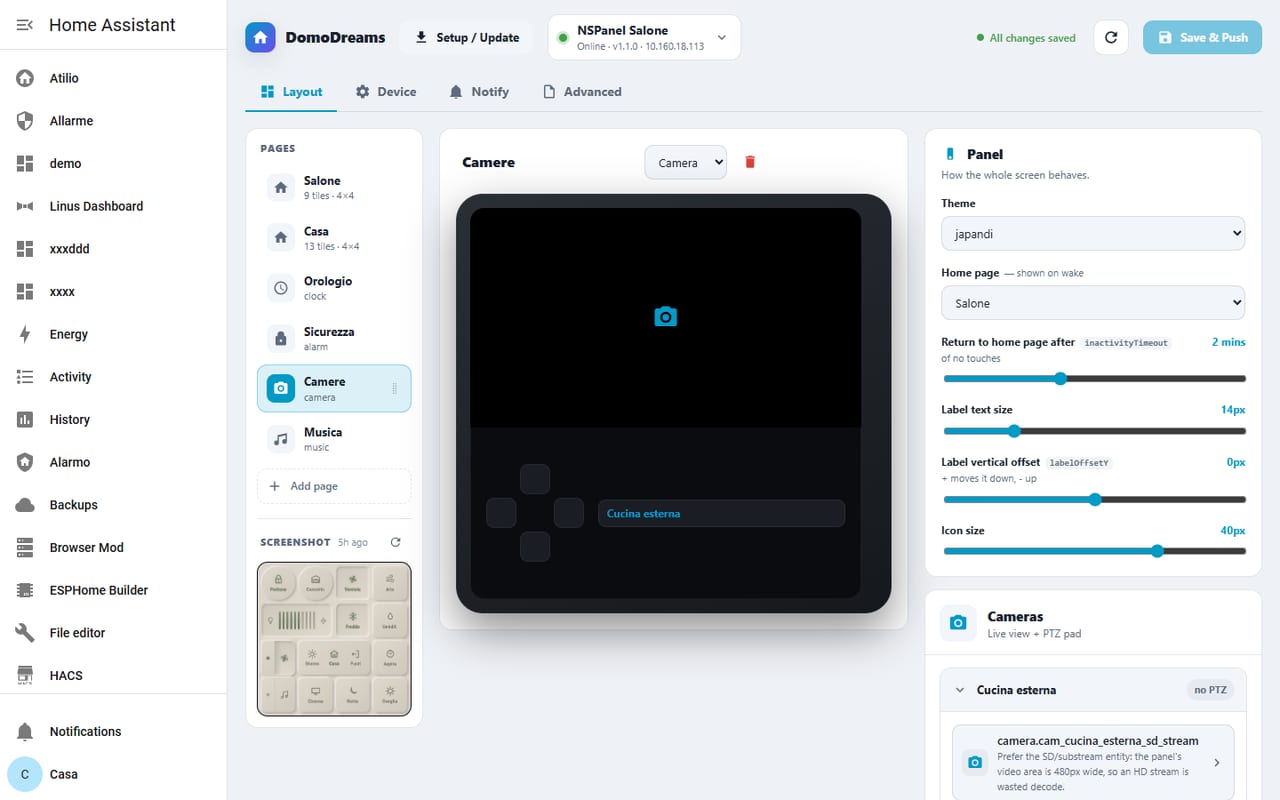
Beyond grids, add clock, alarm, camera or music pages and set the swipe order — here a camera page with its live view and PTZ pad.
Style, sensors & licence
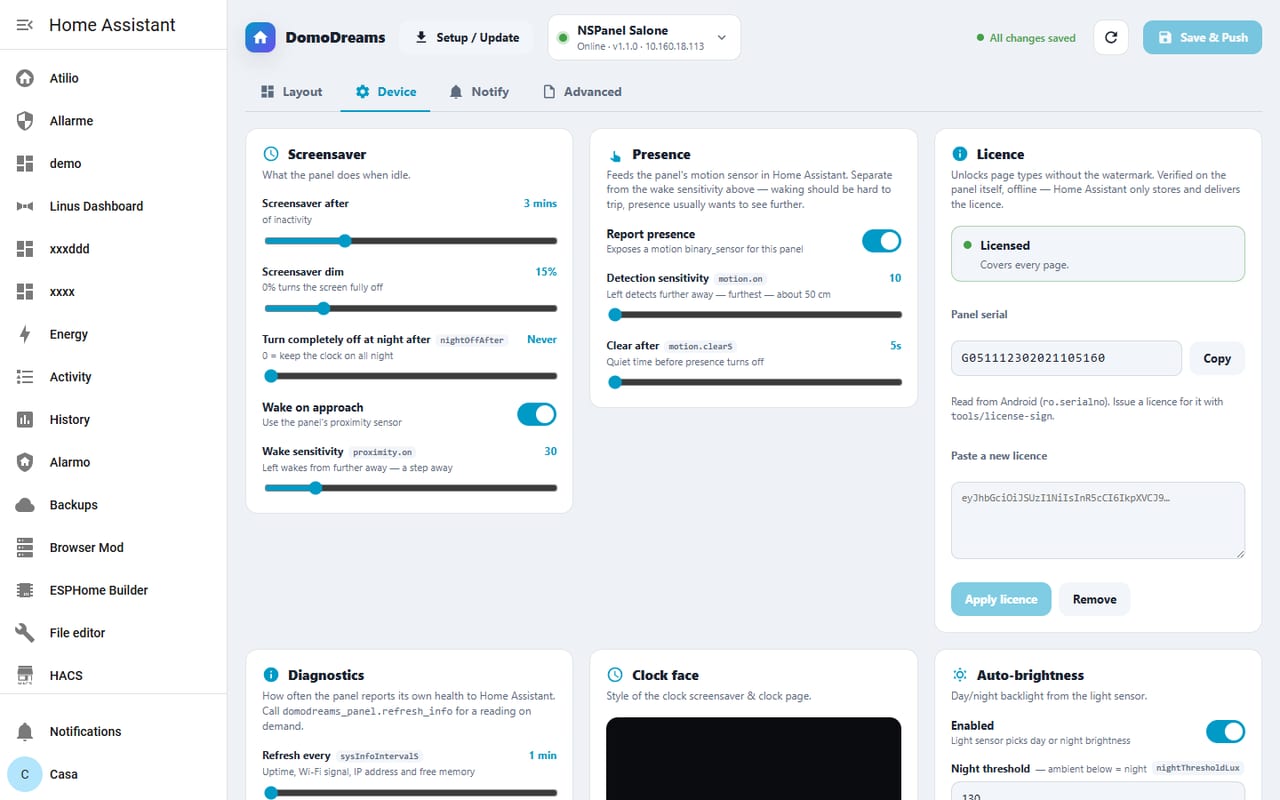
The Device tab: screensaver, presence and light-sensor behaviour, auto-brightness, diagnostics and the licence card.
Verify
The result
Live and licensed
Full licence applied: the grid is clean, no watermark.

Your panel is live.
Pick a style, then take the watermark off with a licence.